

Last Updated: October 29, 2026
Quick Summary
To grade card condition, inspect each card front and back under a bright lamp angled low across the surface, checking the surface first, then all four corners, each edge and the centering. Most guides use six grades, from Near Mint down to Damaged, and you should record every flaw in writing before listing.
- Near Mint cards have sharp corners, clean edges and no visible surface wear.
- If you have to hunt for a flaw, the card is Lightly Played at worst.
- Wash and dry your hands before handling cards so oils do not transfer.
- Record what each flaw is, where it is and how severe it is.
- Sleeve cards in acid-free, non-PVC sleeves and store binders upright away from heat.
Table of Contents
- Why Card Condition Decides What a Card Is Worth
- The Trading Card Condition Guide: Grades From Near Mint to Damaged
- Near Mint vs Lightly Played Cards: Telling the Difference
- Your Raw Card Grading Checklist: A Step-by-Step Inspection Workflow
- How to Photograph Trading Cards for Sale
- Game-Specific Grading Standards and Professional Grading
- Protecting Your Cards After Grading
- Bring Your Cards In for a Hands-On Condition Check
- Frequently Asked Questions
Why Card Condition Decides What a Card Is Worth
Two copies of the same card can sit at wildly different prices, and the gap comes down to card condition. Collectors often talk past each other because one says "mint" and means "straight from the pack" while another means "no visible flaws at arm's length." Those two things are not the same, and the market prices them differently. Learning how to grade the condition of collectible card games is the single most useful skill a collector can build, because it protects you whether you are buying, selling or simply sorting a childhood box. Below, we will show you exactly how to inspect a card, name its flaws and describe it honestly enough that no buyer ever sends it back.
The core idea is simple. Card condition is the sum of every visible flaw on a card, judged against a shared scale that buyers and sellers both understand. Getting that judgement right helps you price with confidence.
The Trading Card Condition Guide: Grades From Near Mint to Damaged
Most trading card condition guides use the same ladder, and it is worth learning the rungs in order. The grades below run from best to worst and apply across the major card games. Professional graders use a tighter numerical scale, but these six labels cover almost every raw card you will handle.
Near Mint (NM) and the Pristine Standard
Near Mint is the top grade for a raw card pulled straight from a pack and sleeved immediately. A Near Mint card looks clean on both front and back, with sharp corners, clean edges and no visible surface wear. Centering should look close to even, though minor print variance is normal and does not drop a card out of Near Mint.
Here is what to check before you call a card Near Mint:
- Corners are sharp with no whitening or rounding
- Edges are clean with no nicks or scuffing
- Surface is free of scratches, dents and print lines
- No creases, bends or folds anywhere
- Border alignment looks even to the eye
Lightly Played, Moderately Played and Heavily Played
Lightly Played cards show minor wear but no damage. You might see light edge whitening, a faint scuff on the surface or slight corner softening. The card still looks good in a sleeve and displays well.
Moderately Played means obvious wear. Expect visible edge wear, noticeable surface scuffing, some corner rounding and possibly light scratches. The card is intact but clearly has a history.
Heavily Played cards show heavy wear across the surface, edges and corners. Creases may be present but the card is still whole. These cards are for players and budget collectors, not for display.
| Grade | Corners | Edges | Surface | Best For |
|---|---|---|---|---|
| Near Mint | Sharp | Clean | Flawless | Display and resale |
| Lightly Played | Slight softening | Minor whitening | Faint scuffs | Sleeved play |
| Moderately Played | Rounded | Visible wear | Scratches | Budget play |
| Heavily Played | Worn | Heavy wear | Creases possible | Casual play only |
| Damaged | Missing or torn | Torn | Major damage | Binder filler |
Damaged Cards and What Still Sells
Damaged covers everything below Heavily Played. Think water damage, tears, missing corners, heavy creasing that breaks the card stock or writing on the face. Damaged cards can still find buyers who want a placeholder copy. Be honest in the listing and price accordingly.
Near Mint vs Lightly Played Cards: Telling the Difference
The Near Mint vs Lightly Played cards question trips up more sellers than any other. The difference usually hides in two places: the corners and the edges. Hold the card under a bright light and tilt it slowly. Whitening on the corners shows as a pale patch against the coloured border. On the edges, look for tiny nicks where the card stock has been rubbed.
A useful rule: if you have to hunt for the flaw, it is Lightly Played at worst. If the flaw jumps out at you across a table, it is Moderately Played or lower. Naming small imperfections clearly helps set accurate buyer expectations.
Pokémon: Iono and Bellibolt 9-Pocket PRO-Binder →
Your Raw Card Grading Checklist: A Step-by-Step Inspection Workflow
A raw card grading checklist turns a vague feeling into a repeatable result. Work through the same steps every time, front and back, and you will grade consistently. The order matters: inspect the surface before the corners and edges, because handling the card to check corners can add new surface marks if your hands are not clean. Here is the workflow we use.
- Wash and dry your hands. Oils transfer to card stock and show up later as smudges.
- Work on a clean, soft surface. A microfiber mat or a clean cloth prevents new scratches.
- Set up your lighting before you touch the card. A bright desk lamp angled low across the card reveals surface scratches and dents that vanish under flat overhead light. Keep the card flat and tilt it slowly rather than tilting your head.
- Check the front surface first. Tilt the card under the angled light and look for scratches, dents and print lines. Use a magnifying glass for fine detail, especially on foil and textured cards where flaws hide in the pattern.
- Inspect all four corners. Look for whitening, rounding and bends. Compare each corner against the others; a single soft corner is easier to spot when you check them in sequence.
- Run your eye along each edge. Note nicks, scuffing and rough cuts. Rough-cut edges can be factory defects rather than wear, so check whether the roughness runs the full length of the edge or is localised.
- Check centering. Compare the border widths on opposite sides. A ruler or a centering tool helps, but the eye is usually enough to separate obviously off-centre cards from acceptable ones.
- Flip the card and repeat. The back matters just as much as the front, and back wear is often heavier because cards rub against each other in binders and boxes.
- Note every flaw in writing. Write the grade and the specific flaws before you list. A phone note with the card's name, the grade and a short flaw list is enough, and it becomes the basis for your listing description.
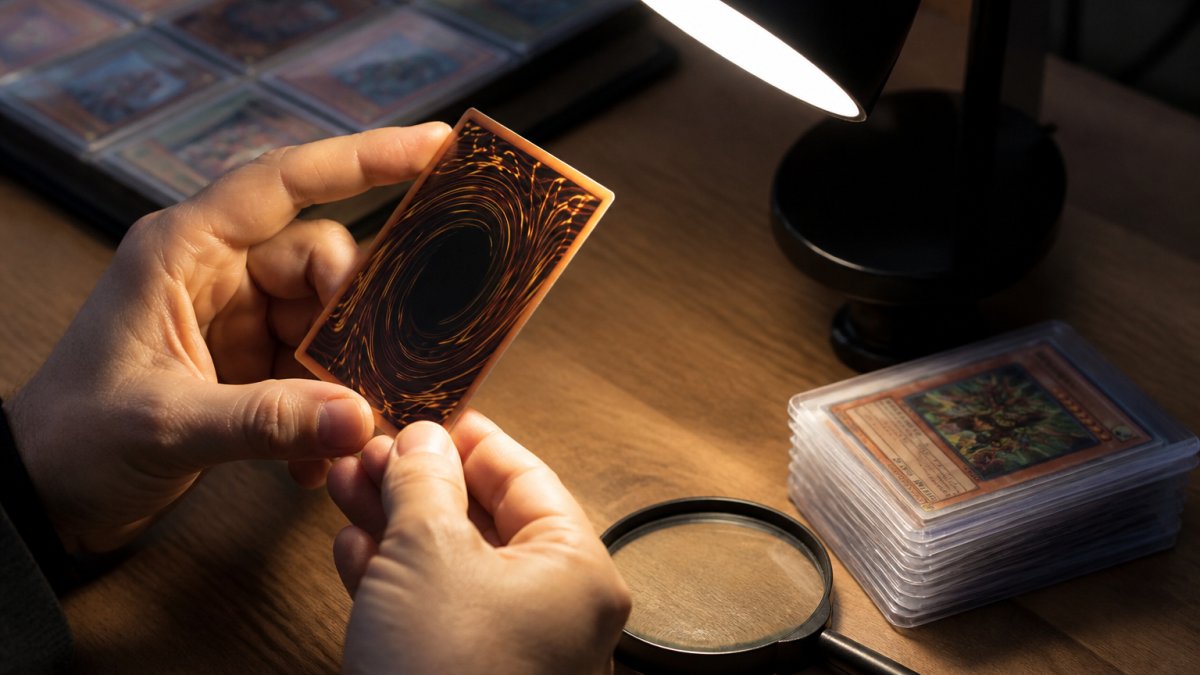
Lighting and Tools for Inspecting Cards
Good lighting does more for your grading accuracy than any tool. A bright desk lamp angled low across the card reveals surface scratches and dents that vanish under flat overhead light. Add a magnifying glass for fine detail and a soft cloth for handling. Keep a notebook or a phone handy to record flaws as you find them. The Chartered Trading Standards Institute guidance on accurate descriptions is a useful reminder that honest, specific descriptions protect both buyer and seller.
Recording Flaws and Disclosing Them in Listings
The inspection is only useful if it reaches the buyer. For each flaw, record three things: what it is (scratch, corner whitening, edge nick, crease), where it is (front or back, which corner or edge), and how severe it is (faint, visible at arm's length, obvious across a table). That three-part note becomes your listing description and your photograph checklist. Photograph every flaw you have flagged, plus straight-on front and back shots and angled shots that catch the light. Buyers reward transparency with faster sales and fewer returns, and a specific description is your best protection if a dispute arises. The Citizens Advice guide to selling goods online explains your responsibilities when describing items for sale.
How to Photograph Trading Cards for Sale
Photographs decide whether a buyer trusts your grade. Shoot on a plain, neutral background in soft daylight, never under a harsh overhead bulb. Capture the front and back straight on, then add angled shots that catch the light and reveal surface flaws. Include close-ups of any corner or edge you have flagged. If a card has a scratch, photograph it. Buyers reward transparency with faster sales and fewer returns. The Citizens Advice guide to selling goods online explains your responsibilities when describing items for sale.
Game-Specific Grading Standards and Professional Grading
Different games carry different expectations. Before you send anything off, check the grading criteria published by the company you plan to use. Hololive collectors can also pick up a Hololive Official Card Game Quintet Spectrum Booster Box.
Protecting Your Cards After Grading
Once you have graded a card, the next job is stopping it from getting worse. Sleeve every card before it goes into a binder or box. Look for sleeves made from acid-free, non-PVC materials.
Store binders upright, away from heat and damp, and handle cards by the edges. A 9-pocket binder with archival-safe pages stores up to 360 standard-size cards.

Bring Your Cards In for a Hands-On Condition Check
Grading from photos has limits, and some cards sit right on the line between two grades. That is the moment to get a second pair of eyes on it. Bring your cards to our shop and we can talk through the checklist with you. We stock sleeves and binders for collectors at every level, and we are always happy to talk cards.
Frequently Asked Questions
How do you grade the condition of a trading card?
Work through four areas in the same order every time: centering, corners, edges and surface. Hold the card under bright, angled light and check the front and back separately. Compare what you see against a grading scale, starting at Near Mint and working down. Note every flaw, however small, because a single crease can drop a card two grades. A consistent raw card grading checklist stops you from over-grading cards you own or under-grading ones you are buying.
What is the difference between Near Mint and Lightly Played cards?
Near Mint cards look almost as they did when pulled from a pack: sharp corners, clean edges and a glossy surface with no visible wear. Lightly Played cards show minor evidence of handling, such as slight whitening on the corners or a few faint surface scuffs, but no creases or bends. When in doubt, grade down rather than up.
Can a card with whitening on the edges still be Near Mint?
A tiny amount of whitening on one corner can sometimes pass as Near Mint, but visible whitening along the edges usually pushes a card into Lightly Played territory. Whitening is a common form of edge wear. Check both the front and back borders under good light. If the whitening is noticeable without close inspection, grade it as Lightly Played and price it accordingly.
How should you photograph a trading card's condition when selling it?
Use daylight or a soft lamp, shoot straight on and at a slight angle to catch surface scratches, and photograph both the front and back. Include close-ups of any corners, edges or marks you have noted in the listing. Avoid filters and harsh flash, which hide flaws and erode buyer trust. Clear, honest photos of a raw card often sell faster than a vague listing, because buyers can assess the condition themselves before committing.
Whether you are sorting a shoebox of childhood finds or building a serious collection, accurate grading is the skill that pays for itself. Get started with AJ Toys & Books and give your cards the care they deserve, from acid-free sleeves and archival binders to friendly, hands-on advice.
